Archives for the month of: November, 2013

You are going to love this! I cannot stand how adorable this little guy is!

So a few weeks ago, Camille Roskelley of Thimble Blossoms decided to start making her quilt patterns as minis, if I remember right she started this as a way to display her patterns in the limited space of Quilt Market in Houston. As a “sample” of sorts Camille provided a free pdf pattern for her mini Raincheck quilt. Which I snatched up immediately!

Camille shared it on Halloween, and I finished my mini quilt the first week of November ( I know I’m a little behind on the posts…)

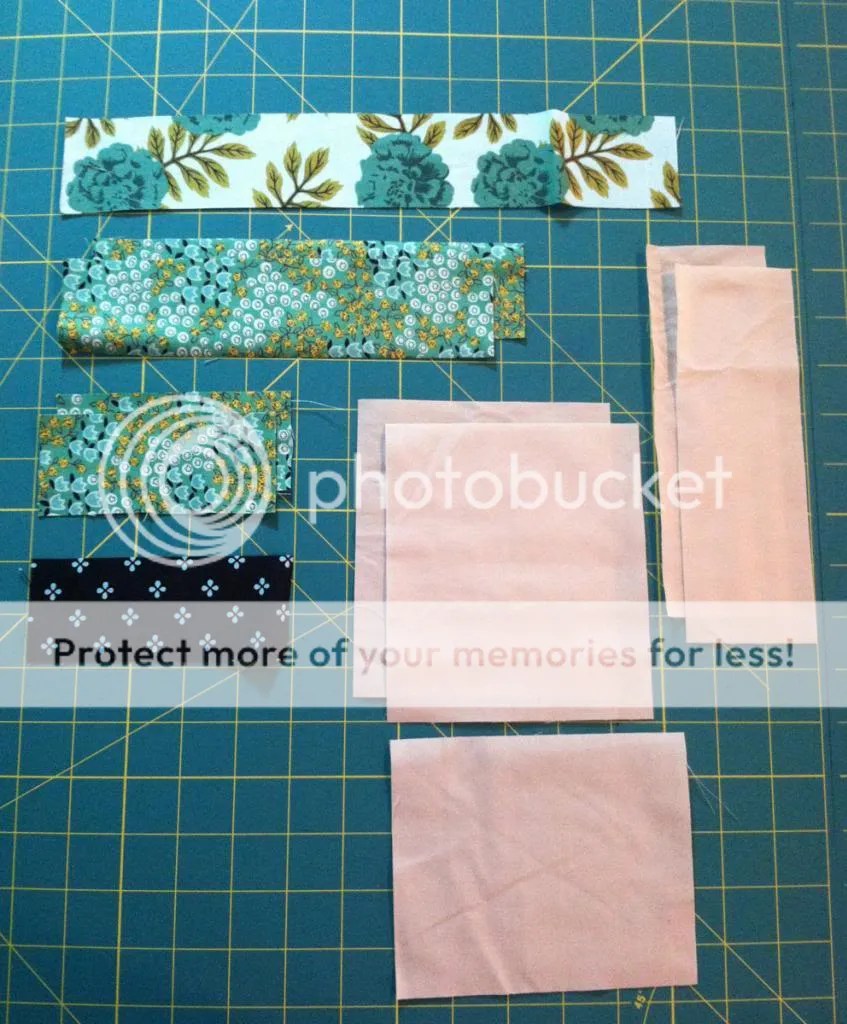
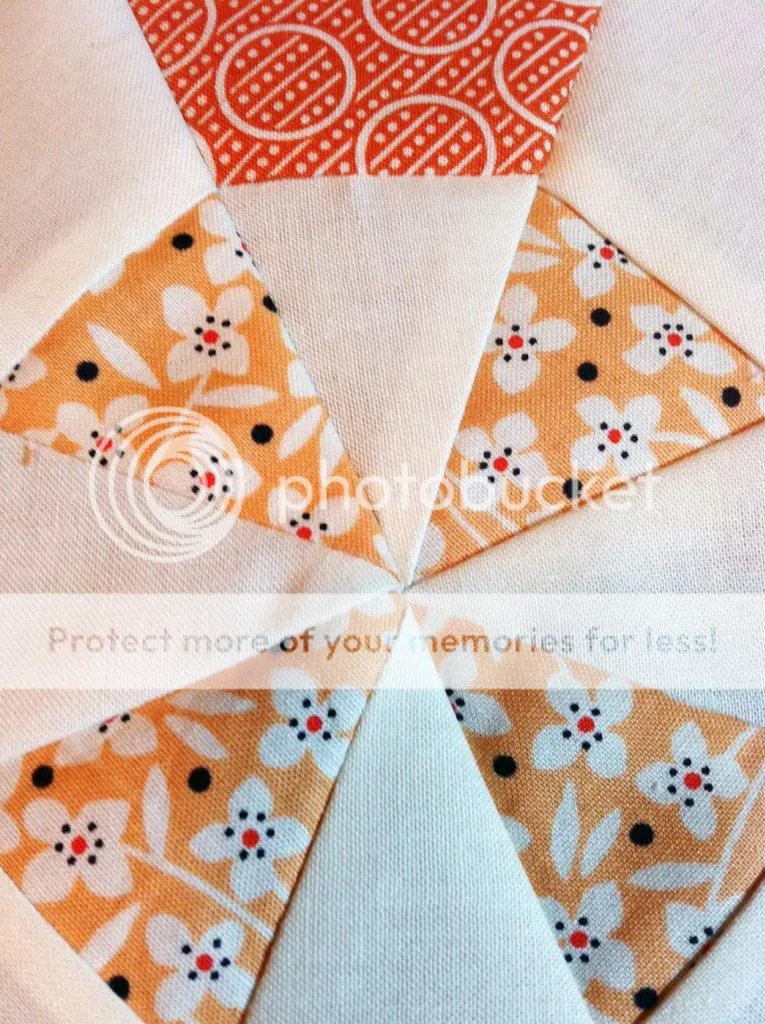
This little guy actually only took a handful of hours to construct, but it did take me a little time to get all of my materials together. I wanted to use a lot of different fabrics from my stash (many of which are DS Quilts by Denyse Schmidt). Also, as it turns out, I needed to grab some fusible web as I don’t do a lot of applique. Though after this little guy, I just might start.

So when it came time to quilt it, I wanted to create the appearance of a “slanted rain” so I stitched diagonals (about 30 degrees) each about 3/8″ apart. I lifted the needle each time I came to the umbrellas so that they would retain a puffy look.

All of the different fabrics I pulled together into this mini quilt. Can you imagine that many fabrics in a 8 1/2 x 12″ quilt?

For me, the best part about whipping up a mini quilt is the accomplishment you feel. It takes only a few hours and you’ve completed something adorable, from start to finish! And you get to practice all of the skills you use for a full sized quilt!

Camille has kept up her game, and put out even more of her quilt patterns as minis. And I am dying to give a few more a try. Speaking of which, she just posted the mini Swoon and mini Spool in her shop this weekend, promising a prize to the first to finish  the Swoon and share on instagram. I won’t be the first though, I need to hold off a few more weeks until the winter break to get too involved in my making. For now, I will have to keep glancing at my little Raincheck on my pinboard and pine for better days!


Did you see my making space featured this week as part of  And Sew We Craft’s Where We Create blog series? I shared a little bit about my space and a few photos of my different work stations and storage spaces. I have a few additional shots from a wider angle, I wish, wish, wish it were not so dark and ugly…

But amazingly I can work in there so much easier than past spaces which were small and beautiful. I guess it really is what’s on the inside that counts, and inside these ugly walls and terrible carpet there is a lot of space!!! (Again, I apologize for the blurriness of these photos, it’s just the lighting that I’m working with in this basement!)

So behind that wardrobe, coat rack, and the yarn/fabric shelf is where we hide household items like the Christmas tree, and such… But I am becoming more and more tempted to absorb that space into my crafting area… I’ve also recently purchased a rolling clothing rack, which I plan to hang a lot of my apparel items and fabric on.

This was still pretty early after our move in this summer, so it’s not a total mess yet! I have also added another large table in the center of this open space for cutting and drafting garment patterns.  Originally I was planning to purchase a new larger loom to take up this space since I sold my last one, but that hasn’t worked out yet… Also, I don’t really want to think about getting it down those stairs, or back up again when we move some day!

I admit, this isn’t my prettiest set-up, but it does function the best! Anyone remember this beautiful set-up from Manhattan, Kansas?

In this house, I actually had two rooms all to myself for my “making space”. One room was for everything I wanted to work on, while the other room was specifically for weaving projects. The first room was a gorgeous yellow and white, the second room was teal and white. So much color and so much light! I was spoiled!

Dreamy, right? So bright and lovely… Sigh. Do you have your dream making space? Someday I hope to combine these two places, the ample room of the current one, with the bright setting and colors of the previous rooms…

xo,

Erin Myone


Okay, I’ve been sitting on this post for well over a week because it took me that long to scan my fabric key, but here it is folks! The November block in the Modern Block Quilt A Long hosted by And Sew We Craft. This month’s block is the Pogo Stick block chosen and instructed by Rosalyn of Sew Delicious. As a reminder, all of the blocks completed for this quilt a long are from the book Modern Blocks by Susanne Woods, which I finally purchased from Joann’s this week with my Veterans Day coupon. But you can find the book almost anywhere online, Amazon, Book Depository, etc.

Above is an image of Rosalyn’s block, and  you can find her tutorial for the Pogo Stick  block here. So every time I piece a block for this quilt a long, I always take a look at how the tutorial host has put it together, and also how Amy at And Sew We Craft has put her’s together. Viewing the other blocks really helps me make decisions about my own block, and as I didn’t own the book until now, I can only assume that they pieced their block pretty similarly to what is in the book.  In this case, they both pieced the foreground element in one print and the background either as a solid or a separate print.

Which, I think looks lovely on both ladies’ blocks, but two things occurred to me while I was deciding how I wanted to arrange my block. First, the block is called pogo stick, so what part of the pogo stick are we looking at here? Second, how can I use more than one print in my block, but also retain the solid background fabric that I have used throughout all of the others? So I decided to break the block into a few different elements of the so called “pogo” I separated the square from the side pegs and then separated the center pole and arranged my fabrics from lightest to darkest in an attempt to create depth. So my pieces looked more like this:

I kept my off white background fabric, then chose Posy Navy for the side pegs, Bouquet Sprout for the square, and Garden Main Floral for the vertical pole. All of my fabrics for the entire Modern Blocks quilt a long are from Juliana Horner’s 2013, Rosette fabric line designed for JoAnn’s Fabrics.

Now the question becomes, was I happy with my deviation from the two reference blocks? Yes, yes I am very happy! I actually love the outcome of the Pogo Stick Block. It was so simple to piece, yet came to be such an awesome modern graphic composition! This is one block I can definitely picture as an entire quilt! And with a little google searching, you will see that others agree, there are numerous full Pogo Stick quilts out there and maybe someday soon I will have made one of them!

Be sure to head over to the Linky Party at And Sew We Craft to view the other quilter’s Pogo Stick blocks! I really enjoy seeing the little twist everyone puts into their own blocks, and this month there is plenty of variation!

Happy Hopping!

Erin Myone

Well, I am at it again! I have just started another quilt a long. This time it is the Lighthouse quilt a long hosted by Faith of Fresh Lemons Modern Quilts. Faith has done such an amazing job so far detailing all of the fabric, batting, and template requirements for all different sizes of quilts. The math that she has put into this has literally blown my mind! I cannot be more thankful that she has taken the time to spell it all out for us!

So this past week was the test block week. I chose some fabrics from my stash, a few Denyse Schmidt prints that I had previously purchased from JoAnn’s Fabrics which I paired with Kona Bone. Here is my handy dandy fabric key, this time I sewed a scrappy dresden piece for the fun of it… (Dresden refers to the shape, typically you put a bunch of these “petals” together to make a lovely flower like shape with either round or pointed edges.)

So, the block itself is paper-pieced. Which is pretty easypeasy anyway, but I have a few tips to add to Faith’s excellent instructions.

First, I like to mark a 1/4″ seam allowance so that I have a line to align with the raw edges of my fabric, rather than eyeballing my seam allowance based on the stitch line that is already printed on the pattern.

From this point, I can easily align my fabrics and be certain I have a 1/4″ seam allowance. But I also have another trick before we do that! I lay my fabric out on a ruled cutting mat so that I can also be certain that my fabrics are centered.

In this case, I centered the 2 1/2″ print on top of the 4 1/2″ solid fabric –leaving me 1″ of solid fabric on each side of the printed fabric. Then I place the paper template and as you can see below, the newly marked 1/4″ seam allowance aligns perfectly with the raw edges of the perfectly aligned fabrics!

Now I am ready to stitch along the seam-line which was already diagrammed into the paper template! Bada-bam!

But, there is more! I have one more tip to share with you to further perfect our paper-piecing! Now that we can perfectly align the seam allowance and seam-line, we might also want to know that the paper template is centered on the fabric. This, my friends, is much much easier when you mark the center line on the paper template.

Now, combined with the ruled cutting mat and our carefully centered and aligned fabric, we are able to perfectly align the paper template to get the very best paper-pieced pattern EVER! OCD? Maybe, but isn’t that what paper-piecing is all about? (Don’t get confused, I am now using the second piece of the template.)

Okay, so if you’ve never paper-pieced before you do get to a point where you have this little mess.

Which is my least favorite thing about paper-piecing. It just seems so wasteful… So I’m going to ponder ways that I can reduce the waste produced when piecing my quilt blocks… Speaking of which, I bet you would like to see the finished test block!

TA-DA!

(Sorry for the fuzzy picture, I am working in our basement which doesn’t have the best light and as we roll into winter, I am certain I will be taking more and more photos in dimly lit settings! :S )

Check it out! Isn’t she beautiful? I know…

I do plan to construct an entire quilt but, my fabrics haven’t arrived yet, and I am going to be piecing a very special quilt for a very special project which I will tell you more about very soon! If you would like to participate in the Lighthouse quilt a long, be sure to visit Faith’s blog (the link is posted at the top of this post), to find the template and piecing instructions, as well as all of the wonderful calculations! And of course, share your progress on instagram, flicker or whatever platform you use!

xo,

Erin Myone