Well, I am at it again! I have just started another quilt a long. This time it is the Lighthouse quilt a long hosted by Faith of Fresh Lemons Modern Quilts. Faith has done such an amazing job so far detailing all of the fabric, batting, and template requirements for all different sizes of quilts. The math that she has put into this has literally blown my mind! I cannot be more thankful that she has taken the time to spell it all out for us!
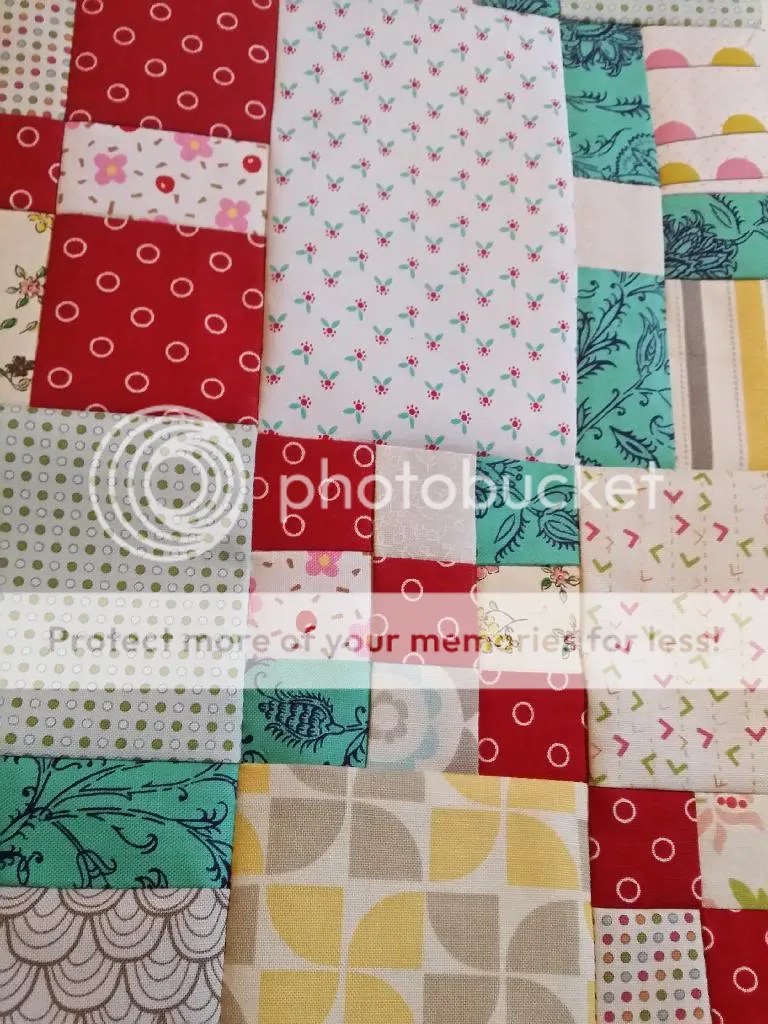
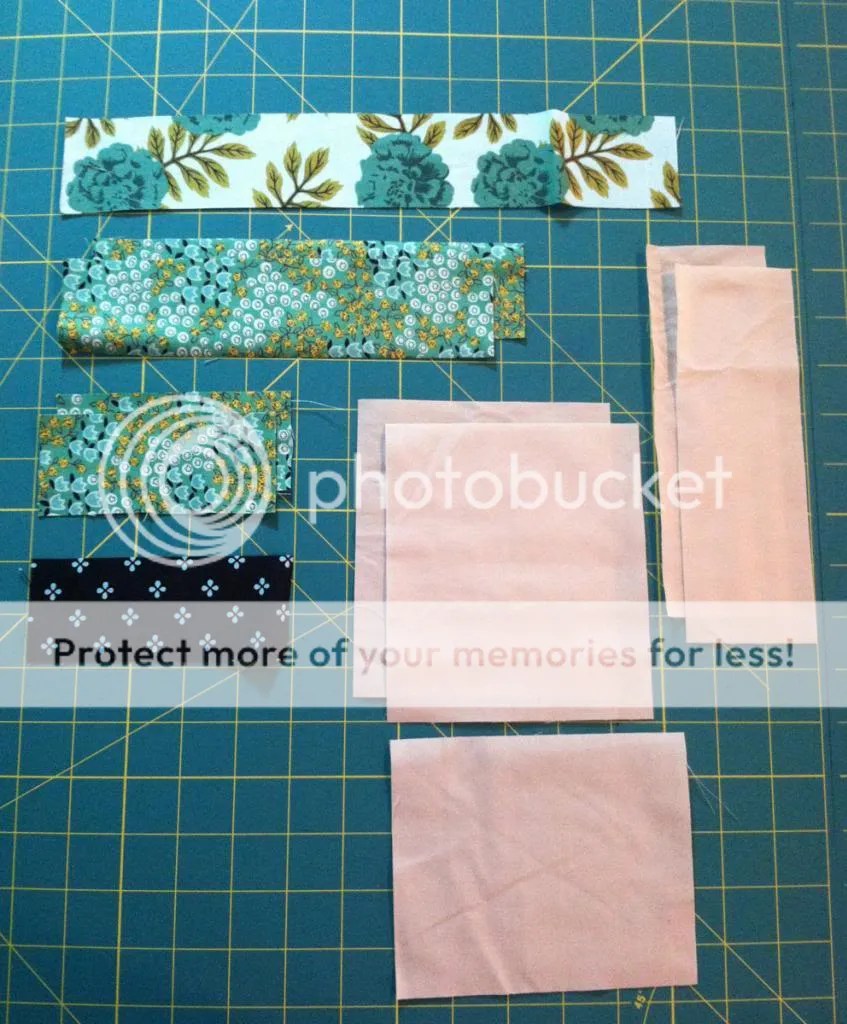
So this past week was the test block week. I chose some fabrics from my stash, a few Denyse Schmidt prints that I had previously purchased from JoAnn’s Fabrics which I paired with Kona Bone. Here is my handy dandy fabric key, this time I sewed a scrappy dresden piece for the fun of it… (Dresden refers to the shape, typically you put a bunch of these “petals” together to make a lovely flower like shape with either round or pointed edges.)

So, the block itself is paper-pieced. Which is pretty easypeasy anyway, but I have a few tips to add to Faith’s excellent instructions.

First, I like to mark a 1/4″ seam allowance so that I have a line to align with the raw edges of my fabric, rather than eyeballing my seam allowance based on the stitch line that is already printed on the pattern.

From this point, I can easily align my fabrics and be certain I have a 1/4″ seam allowance. But I also have another trick before we do that! I lay my fabric out on a ruled cutting mat so that I can also be certain that my fabrics are centered.

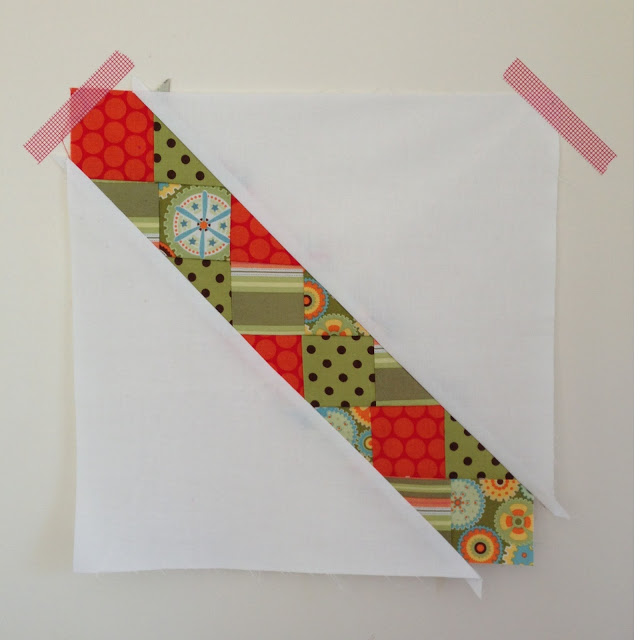
In this case, I centered the 2 1/2″ print on top of the 4 1/2″ solid fabric –leaving me 1″ of solid fabric on each side of the printed fabric. Then I place the paper template and as you can see below, the newly marked 1/4″ seam allowance aligns perfectly with the raw edges of the perfectly aligned fabrics!

Now I am ready to stitch along the seam-line which was already diagrammed into the paper template! Bada-bam!

But, there is more! I have one more tip to share with you to further perfect our paper-piecing! Now that we can perfectly align the seam allowance and seam-line, we might also want to know that the paper template is centered on the fabric. This, my friends, is much much easier when you mark the center line on the paper template.

Now, combined with the ruled cutting mat and our carefully centered and aligned fabric, we are able to perfectly align the paper template to get the very best paper-pieced pattern EVER! OCD? Maybe, but isn’t that what paper-piecing is all about? (Don’t get confused, I am now using the second piece of the template.)

Okay, so if you’ve never paper-pieced before you do get to a point where you have this little mess.

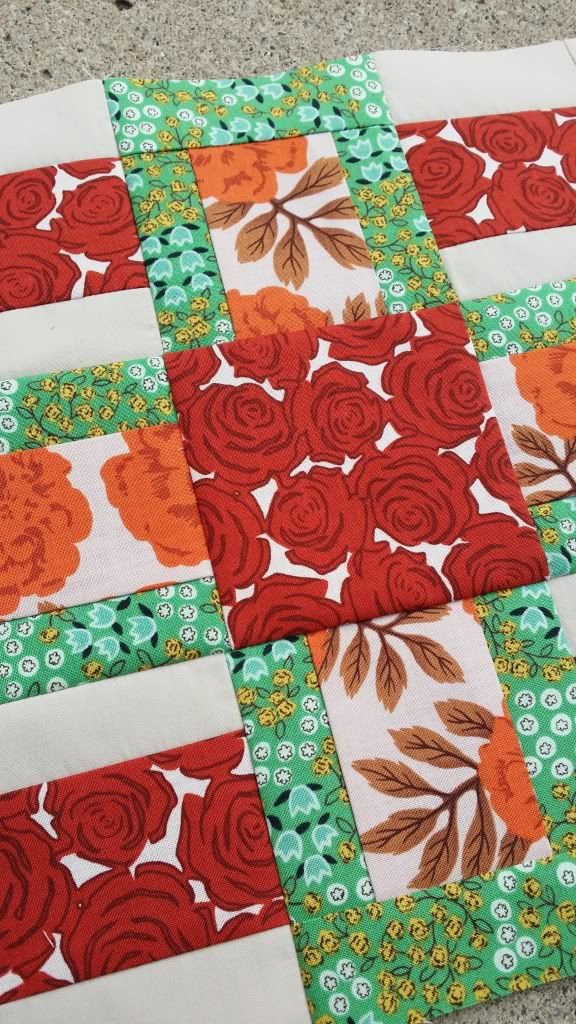
Which is my least favorite thing about paper-piecing. It just seems so wasteful… So I’m going to ponder ways that I can reduce the waste produced when piecing my quilt blocks… Speaking of which, I bet you would like to see the finished test block!

TA-DA!
(Sorry for the fuzzy picture, I am working in our basement which doesn’t have the best light and as we roll into winter, I am certain I will be taking more and more photos in dimly lit settings! :S )
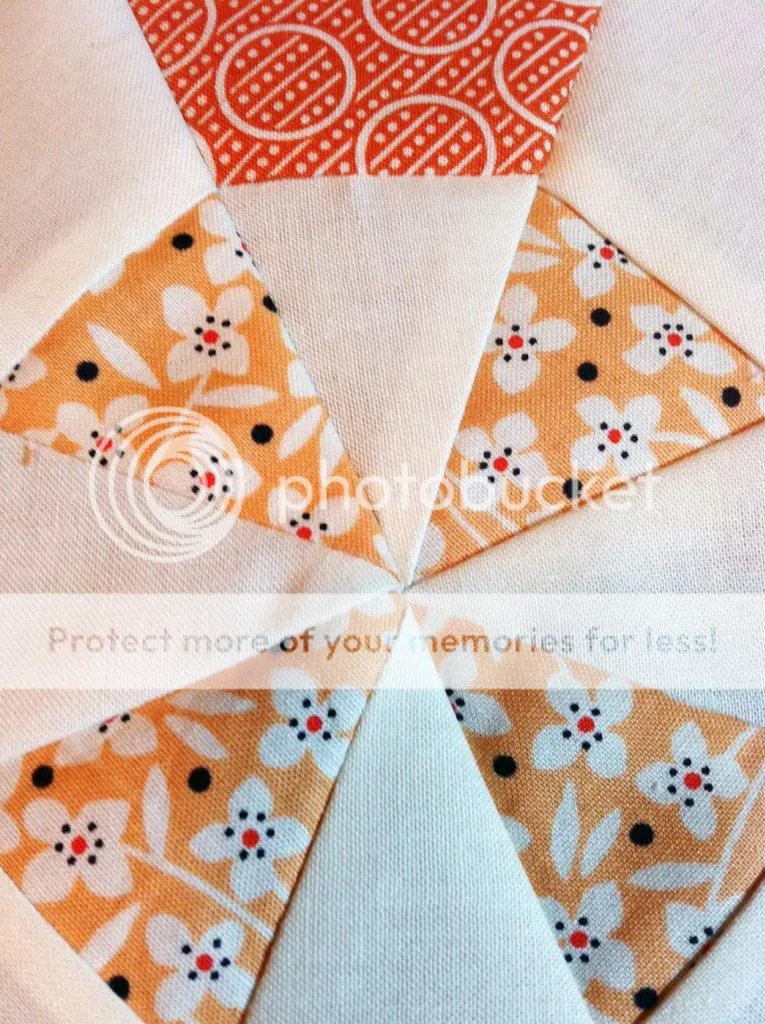
Check it out! Isn’t she beautiful? I know…

I do plan to construct an entire quilt but, my fabrics haven’t arrived yet, and I am going to be piecing a very special quilt for a very special project which I will tell you more about very soon! If you would like to participate in the Lighthouse quilt a long, be sure to visit Faith’s blog (the link is posted at the top of this post), to find the template and piecing instructions, as well as all of the wonderful calculations! And of course, share your progress on instagram, flicker or whatever platform you use!
xo,