

and

enjoy,
This has been a slow and sorry week for the ol’ blog here. I have been working with fervor on my research and writing all day everyday, but not finding time to write here. So a short update.

Crocheting is happening during the moments of reading or thinking in between the moments of typing and editing. I have added my second color to the Crochet Along blanket. I can’t remember how much detail I previously gave on this blanket, but my blanket is 74 inches wide, and is being crocheted entirely of double crochet stitches on a size H hook. Needless to say it is a somewhat slow process, but I have actually gained quite a bit of speed over the past 4 days since I began.

Tonka walks are still happening of course. Here she is with her neighborhood cat friend. They run into each other when they are both out on their leash in the mornings or evenings. It’s very sweet, the cat kind of intimidates Tonka. Lately, Tonkas has been trying to take advantage of her walk time by dragging me along on longer walks or finding pinecones to play fetch with. I think she finds all of the still time devoted to writing or crocheting quite dull.

And finally, there are still flowers in bloom though we seem to be in a transitional stage between the summer and fall flora.

No time to sit at the sewing machine this week, which has me down in the doldrums but hopefully that will all change after Monday! Wish me luck!
xo,
For this Wordy Wednesday, I am sparing you many words as I have spent many hours typing a research paper.
So instead, I will share with you a work in progress image for the crochet along.

As well as, a super fun image of my new shiny purple hair!

Happy Hump-day!
xo,
Erin Myone
So I’m changing gears a little bit this week to work on a few crochet projects. I couldn’t help myself, JoAnn’s Fabrics was having a major sale on yarns so I took advantage, and took the plunge into large scale crochet projects!

Yesterday, I began work on the “Weekend in Stockholm” throw by Debbie Stoller of Stitch Nation. This pattern was released for free in 2010 to coordinate with the release of her yarn line, Full o’ Sheep. The yarn was beautiful but at the time I could not afford it, so I picked up the free pattern and went on with life. For the past three years, that pattern has remained pinned to my inspiration board as a “someday” sort of project. Well, yesterday was someday. With JoAnn’s sale on yarn, and the dream pattern in hand, I hypothetically went to town and ordered the required 25 skeins of yarn in various colors online. I chose Lion Brand, Wool Ease as my replacement yarn (Full o’ Sheep is no longer being manufactured). The colors won’t be an exact match unfortunately, but I think they will still be quite nice; I am working with Avocado, Cranberry, Denim, Eggplant, Fisherman, Mustard, Ranch Red, and Violet.

In no way do I consider myself to be an advanced crocheter(?). So this project is truly a leap from my comfort zone, but I think it’s beautiful and hopefully that will be the inspiration I need to keep going! So I should also mention that with a little help from Ravelry, I located these excellent tutorial videos that break this granny square blanket down into a round by round easy to follow pattern (the free pattern is lacking in a diagram and clear instructions…) Thanks so much to Knit my Grits for creating these! However, last night I only had time to do round 1 and round 2 of my first granny square, so my progress is very very slow!
Tonight, I received my yarn to join in on another crochet project, the Crochet A Long hosted by And Sew We Craft. The first project of the Crochet A Long is a simple crocheted blanket which repeats the same stitch through every row. This makes it a perfect beginner large scale project, and considering I have never attempted to crochet anything larger than what I could hold cupped in two hands, it seems like a perfect project for me. I jumped online and ordered 15 skeins of Deborah Norville’s Everyday Soft Worsted Cotton in Cornflower, Navy, and Cappuccino, from that same excellent Joann’s yarn sale.

Technically, the crochet a long started at the end of last week, and I’m quite jealous of some participants’ progress because I didn’t receive my yarn for this project until this afternoon! Anyway, I decided to follow Tonya’s lead, host of the crochet a long and blogger of The Crafty Mummy, and chained for 74″. I worked the first row of stitches while enjoying the True Blood season 6 finale and Newsroom (we watch HBO shows a day late), but two hours later I have only made it 3/4 of the way through the first row!

Please wish me luck on these might large crochet projects! I think I am going to need it! Many more updates to come, I am sure!
Happy Hookin’
Crafternoon!
I am adding a new feature to the blog: Yarn 2-ways. A post for this category will be similar to watching Iron Chef when they present “lobster three ways”. You will get to see the results of a yarn when it has been utilized in two different ways, most likely knit and crochet. Sometimes, it will be a simple project. Other times it may be more challenging, but whenever a pattern is referenced it will be linked or presented as a tutorial!
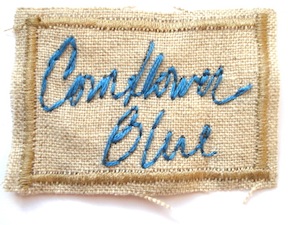
But wait it gets better! I have called in the help of my good friend Cortney, blogger of Cornflower Blue, to guest host half of the Yarn 2-ways posts! Cortney is one of the most talented and creative people I know, and she has skills with a hook or needles! I am so excited to share this opportunity with her!
The first yarn that we are working with is actually a yarn I bought two and a half years ago at Knit Wits in Key West, Florida while on my honeymoon! I purchased two skeins because I just had to have this yarn, but I didn’t know what I wanted to do with it at the time and I certainly didn’t want to run out. Lambada, by Tedman & Kvist, is a lightweight novelty yarn made of 45% poliamid, 27% polyester, and 28% cotton. (I believe this yarn has also been picked up by Mango Moon now.) When I first brought this yarn home and tried to look it up on Ravelry to see what others were doing with it, there was nothing to be found. It was like the yarn did not exist…
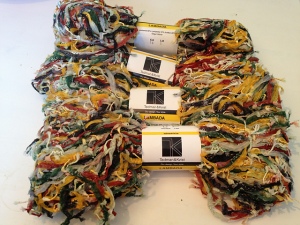
But, soon you will see how I tackled this mystery yarn. Then we will all see the results of my challenge to Cortney as she updates us on her use of the yarn.
xo,

Remember all of those little triangles we trimmed off while making our flying geese in the block below?

Well, I got busy and started sewing those little triangles just about as quickly as I was cutting them to create teeny tiny half square triangles (HST). In this technique for HST, you begin with two equal triangles placed face to face, then you sew them down the long side to create a single square. See the brief illustrated tutorial below.

The Follow the Leader quilt block above has 16 flying geese, therefore 32 HST!. So once, I had all of these teeny tiny HST sewn, I started piecing them together into rows. Then sewing the rows together.

Once I finished piecing the tiny postage stamp sized HST together the finished block was a whopping 5″ x 6″!

By no means is this a perfectly pieced block, but really how could it be when the pieces are so tiny and individually pieced from tiny triangles!

But I do love my tiny little HST Postage Stamp quilt block. Maybe I will attach it to the Modern Blocks quilt backing when we complete the quilt a long!
Goodnight all, xo!
Recently, I have become quite familiar with a piecing technique called “flying geese”. Flying geese are a common quilting element; they are often seen as an element of traditional and modern quilt blocks, or a repeating element across the entire quilt.
Above is an example of the traditional flying geese, you will notice that it is a geometric isosceles triangle (two sides and two angles are equal). Below is an example of a non-traditional flying geese, in this example the point is made in the same manner as those above, but the diagonals do not extend to the bottom of the colored block to create the triangle. Rather they meet the edge partway down the side and create a pentagram in the shape of a house.

Below I will explain how to make the traditional version of the flying geese block.

First, you will need three pieces for each “goose” you plan to make. For the traditional geese, you will want a rectangle where the length is two times the width (L=2W) . For example, above I have illustrated a 4″x2″ rectangle . You will also need two squares, you will want each side of the squares to be equal to the rectangles width, so in this example the rectangle width was 2″ so each square will be 2″x2″.
Notice the dotted diagonal lines, these will be your stitching lines, and they will also create the short sides of your isosceles triangle (geese). Before you sew, it is wise to mark these diagonal lines on your squares so that you may follow the diagonal, in order to create a straight line. You may mark this line with a ruler and disappearing ink pen, colored pencil, or chalk.

Next, you will lay one square over the rectangle at a time, placing them face to face, and aligning the square on one half of your rectangle. Stitch the diagonal line that you have previously marked, with a short length straight stitch. I like to do a whole string of these at a time, before I move on to the next step!

You will now trim your seam allowance to the standard quilting 1/4″, as shown in the images above and below

Repeat these steps with each of your “geese”.
You will then press the pieces, with the seam allowance flattened towards the patterned or darker fabric. In the next image you will see the back and front of your piece thus far.

Here we go again!

Now, you will align the second square with the other end of the rectangle, be careful to align your marked diagonal so that it meets at a point in the center of your rectangle. Again stitch your marked line, trim your seam allowance, and press it towards the darker or patterned fabric.

Above, you will see an image that depicts the back and front of your flying geese. Notice that the point of your patterned fabric is about 1/4″ below the top of the rectangle, this will become the seam allowance when you sew your pieces together.

So there you have it! Your flying geese are ready to be put together into whichever block or quilt you like!

As you saw above in my example of a non-traditional flying geese, there are ways that you can modify these steps to change the shape of your pieced block. When modifying you may change the proportions of your length and width between the rectangle and the squares, just remember the length of the diagonal determines the depth of the point. You can easily choose a diagonal length that will stop midway down the side of your patterned piece to create the house like shape you saw in the Quatrefoil block above. Or choose to create a very shallow point by ending the diagonal only 1/4 of the depth of the patterned piece. There are so many ways you can play with the flying geese technique so be sure to try a few modifications and record your findings! Remember, quilting is all about geometry!
Now, if you are like me, you will have saved all of those little corners that you trimmed. In my next post, you will see what I have done with what would be fabric waste to many people. 😉
Good morning!
I’ve never known another name for naked ladies, but I imagine I might have some extra traffic for this post due to the name. I, however, am writing about the flower! Are they a weed? Or do people intentionally plant naked ladies? They seem to spring out of the ground in a single evening (at least I never notice them until they are tall blooming stalks!)

My husband says that any plant that grows where it is not wanted is a weed. So if you like your naked ladies where they are, then they are not weeds. If you hate your rose-bush, then it is a weed. At least, that is his rule of thumb.

I imagine enough people are fans of Naked Ladies that they aren’t often considered weeds. This poor Echinacea though, could sure use some love. Echinacea root has wonderful herbal medicinal purposes, you think it would be given some more attention!

But then I have no memory of an Echinacea plant that didn’t look a little distraught. Maybe that’s their thing?
Anyway, off to sling cupcakes! With an afternoon of research and writing ahead. I sure hope to get back to those HST soon.
P.S. – I have found my inspiration for my first original quilt block design! So excited to share it with you!
xo,
Erin Myone
My second Amy Butler Cameo charm pack just arrived! Time for more half square triangles and then piecing it all together!


