Archives for posts with tag: Modern Blocks


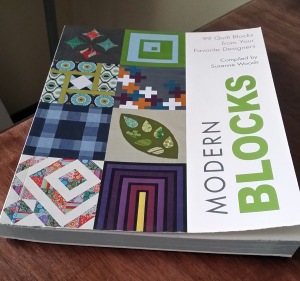
Modern blocks book

One project that is continuing into the new year is the And Sew We Craft Modern Blocks Quilt a Long. This month’s block was selected by Alyce of Blossom Heart Quilts. You can find a tutorial for the Everything Equal block on her blog here.

Alyce’s Block

Alyce mentioned that she specifically chose this block as an opportunity to use some of the smaller scraps that remain after cutting the previous nine blocks. I did manage to use a few of these scraps, but I also wanted to use this block as an opportunity to integrate all of the prints into one block to help tie the quilt together. I know normally in these posts at this point, I would share a fabric key. But this time I am going to be a little lazy, because instead of 2-4 fabrics this one has all of the Juliana Horner prints that I own (yes, I am missing 3 prints from the Rosette line). So instead I’m just going to skip to the block reveal this time!

I am pretty happy with my fabric placement and construction, but it was a simple block… I did have to use a few of the prints more than once, but it all seems to balance out nicely.

I haven’t decided on a layout yet, and we still have three more blocks so there is plenty of time. I think I will definitely add sashing and cornerstones between the blocks. I might remake a few of the blocks too (second row right, and third row center). Or I might even make a few extra blocks so that it’s 16 or 20 instead of 12, who knows?!?! I’m really happy that I have joined in on this particular quilt a long, the monthly block allows enough time to enjoy the process free of stress. Make sure you head over to the linky party to see everyone else’s block!

xo,

Erin Myone

Each time I start to type, I have the greatest desire to remove my splint… Or just give up before I hardly get started, I suppose this is a test of my patience.

You see, winter arrived in full force this week, just in time for the solstice, and I fractured my right wrist when I slipped on the icy sidewalk in front of our house. I definitely underestimated the layer of ice that had rained down the night before. But it was the last day of finals, and I had things to do…

Anyway, its fractured and splinted now, and I still have things to do–but I have a pretty good excuse for not doing them…

=====Nine Days Later=====

Well, I started writing this post Pre-Christmas, but with the splint and the fresh fracture I just didn’t have the patience for it… Now, I have a neon yellow cast which I will wear until February. And, I need to practice typing with it anyway because my life will not wait for it to heal. Yes, it was my right wrist and yes, I am right-handed. About as frustrating as it can get…

But anyway, before visiting with the orthopedic surgeon today, I did a little bit of cutting and sewing with the splint on. You see, I had a grand plan to finish some WIP’s and start a few new projects during this break. So I ordered some new fabrics and was very excited to work on the Tone it Down quilt designed by Lissa of Moda Lissa for the American Patchwork & Quilting Quilt a-long. I finally ordered some Essex linen to make up a few projects from Ayumi Takahashi’s Patchwork Please book. I will be working on Elizabeth  of Don’t Call me Betsy’s Lucky Stars Block of the Month  in 2014. Working on my Lala Salama 100 Quilts for Kenya quilt. And continuing the And Sew We Craft Modern Blocks QAL and Crochet a-long blanket!

I had big plans for this Holiday from classes! It was the last day of Finals week when I injured my wrist and on the same day I began to receive some of the beautiful fabrics I  had ordered! Then for Christmas, I received a generous gift certificate for the Fat Quarter Shop from my parents. My pre-order of Vintage Quilt Revival arrived on my doorstep, along with the rest of the fabrics I had ordered pre-injury (I mean, those holiday sales were crazy good right?).

So, as I said, I did a little bit of cutting and sewing between the time when I injured my wrist and today’s orthopedic casting. For starters, I spent a good amount of time cutting fabric for the Tone it Down quilt. Just last night, I finished cutting all of the bright fabrics–leaving only the low volume background fabrics to finish up. Right about now, I am wishing I had a die-cutting machine… I think I could manage cranking that with my left hand since I have been strongly advised against using my right hand for much of anything beyond typing.

I also, cut and stitched up a Prettified Pincushion from Patchwork Please with my new Essex linen.

There are a couple of other great little patterns in that book that I would love to work on, I admittedly got on the Zakka 2.0 bandwagon a little late after seeing all of the darling projects pop up during the Zakka a-long. I am pretty excited about the Happy Hexagon trivet, Sweet Trips Embroidery Pouch, Vintage Pencil Case and Triangle Patchwork Box Pouch, all are far too cute (take a peak at some of these in the flickr group.)

That’s all I managed during those few days surrounding Christmas. Maybe I can sew with my hand in the cast, but I probably won’t be able to do much else (rotary cutting, crochet, etc…) The good news is that I officially finished my Master’s degree (yay!), the bad news is I am pretty behind on a lot of other things (graduate assistantship hours, journal submissions, conference abstracts, literature reviews, class prep. *the exciting life of a PhD student*), but maybe I  can catch up a bit now that I wont be tempted by crafting… We’ll see!

Oh, and Happy New Year! To quote Walt Disney, “Keep moving forward.”

Hey! Guess what?

I won the October prize for the And Sew We Craft Modern Blocks Quilt a Long! With your help, I received 120 “Likes” making my block the most “liked” block, and therefore the winner! Above is a photo of the October “Best Friends” block, and below is a photo of my prize, a Fat Quarter bundle of Cypress Acacia by Tula Pink! The sponsor of the October prize, The Fat Quarter Shop, also included a free pattern for their quilt Layer Cake Lemonade. I am so thankful that there are excellent sponsors out there, who give so freely of wonderful prizes, it makes being part of the online craft community so much fun!

I am so happy to have won this prize, I think Tula Pink’s fabrics are really lovely. Now, I will need to buy the fat quarter bundles for the other two color ways in the Acacia line. I think, I am a little OCD about having complete collections… But really they are lovely, and why wouldn’t I want them? So keep an eye out, as these fabrics start popping up in projects in the next  few months. I am not sure what I will do with them yet, but I am very excited to get to work with them!

Finally, I want to thank all of you who took a few minutes to travel over to the Linky party at And Sew We Craft to vote for my block. If you only made it over to vote once, I thank you, that is awesome. If you went back on multiple occasions to vote for my block, I cannot be more thankful for your support, you are amazing people!

xo,

Erin Myone

Welcome back!

I am here to share the December block for the And Sew We Craft Modern Blocks Quilt a Long. This month’s block is “Crossroads” originally designed by Angela Pingle blogger of Cut to Pieces, chosen and instructed for the Quilt a Long by Amy at Actually Amy. If you would like to attempt the block yourself, and haven’t purchased the Modern Blocks book (compiled by Susanne Woods), you can find a tutorial led by Amy here. Below is Amy’s block, sewn from Little Apples fabrics by Aneela Hoey for Moda, which by the way is currently on sale at The Quilted Castle.

This is another block in the quilt a long that works best if you have a novelty print like those from Little Apples because you can fussy cut the larger pieces, as Amy did for the children playing and the clothes. Because I am using all-over non-directional prints, I really didn’t bother fussy-cutting any of my pieces, but I did choose to use that extra space for larger prints which I haven’t been able to utilize throughout all of the blocks. I also, chose to maintain my background solid to create continuity within the blocks.

So, above is my fabric key, I chose to work with Terrace Main in orange cream, Bouquet in sprout, and Rosebed in Pomegranate. All of these fabrics are from Juliana Horner’s 2013 Rosette line, designed and sold exclusively at JoAnn’s Fabrics (which makes it really accessible when you live in a town without amazing modern fabric shops.) When I purchased my fabrics, back in June/July, I purchased 9 of the 12 prints in the line, there were a few I just didn’t love to pieces at the time. But now, I am really wishing I had purchased those other prints so I could have the full collection, unfortunately those three have sold out at my local JoAnn’s, and they don’t seem to be bringing them back. They are available online, but only in full yard cuts and I really only want half yards, so I’m on the fence about ordering them. But I will mention, that Juliana Horner has already introduced some new fabrics at JoAnn’s in November. I went ahead and snatched up a half yard of each of those too, and am in love with the colors and prints, but that’s for another post.

So here she is, a little unconventional as far as color combination, but I think actually quite lovely.  This was a challenging block to match seams on, and I think I could actually create it with greater success, if I re-organized how the blocks are pieced. But I won’t, because I am overall pretty happy with the outcome.

A few photos to swoon over…

And an updated photo of all 8 completed blocks, thus far. Not too shabby!

The plan is for 12 total blocks, so we are already 2/3 finished with the blocks.

However, I finally purchased the book, and I think I might just make up a few more blocks, maybe an extra four, so it is a 16 block, or even an extra 8 so that it is a 20 block… There are just so many blocks in the book that I want to try, and where better to put them than in a sampler quilt! (There are by the way, 99 blocks in the book, but I won’t be making them all, for this quilt at least!

So, why not pop over to the Linky party to see what the other quilt a long participants are whipping up this month! Also, be sure to return tomorrow for a very special post also related to the Modern Blocks Quilt a Long, which I know some of you have been asking about!

xo,

Erin Myone

Okay, I’ve been sitting on this post for well over a week because it took me that long to scan my fabric key, but here it is folks! The November block in the Modern Block Quilt A Long hosted by And Sew We Craft. This month’s block is the Pogo Stick block chosen and instructed by Rosalyn of Sew Delicious. As a reminder, all of the blocks completed for this quilt a long are from the book Modern Blocks by Susanne Woods, which I finally purchased from Joann’s this week with my Veterans Day coupon. But you can find the book almost anywhere online, Amazon, Book Depository, etc.

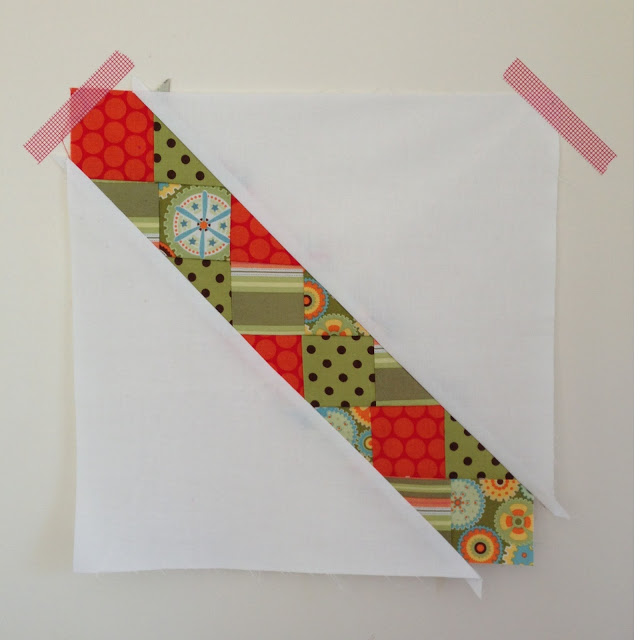
Above is an image of Rosalyn’s block, and  you can find her tutorial for the Pogo Stick  block here. So every time I piece a block for this quilt a long, I always take a look at how the tutorial host has put it together, and also how Amy at And Sew We Craft has put her’s together. Viewing the other blocks really helps me make decisions about my own block, and as I didn’t own the book until now, I can only assume that they pieced their block pretty similarly to what is in the book.  In this case, they both pieced the foreground element in one print and the background either as a solid or a separate print.

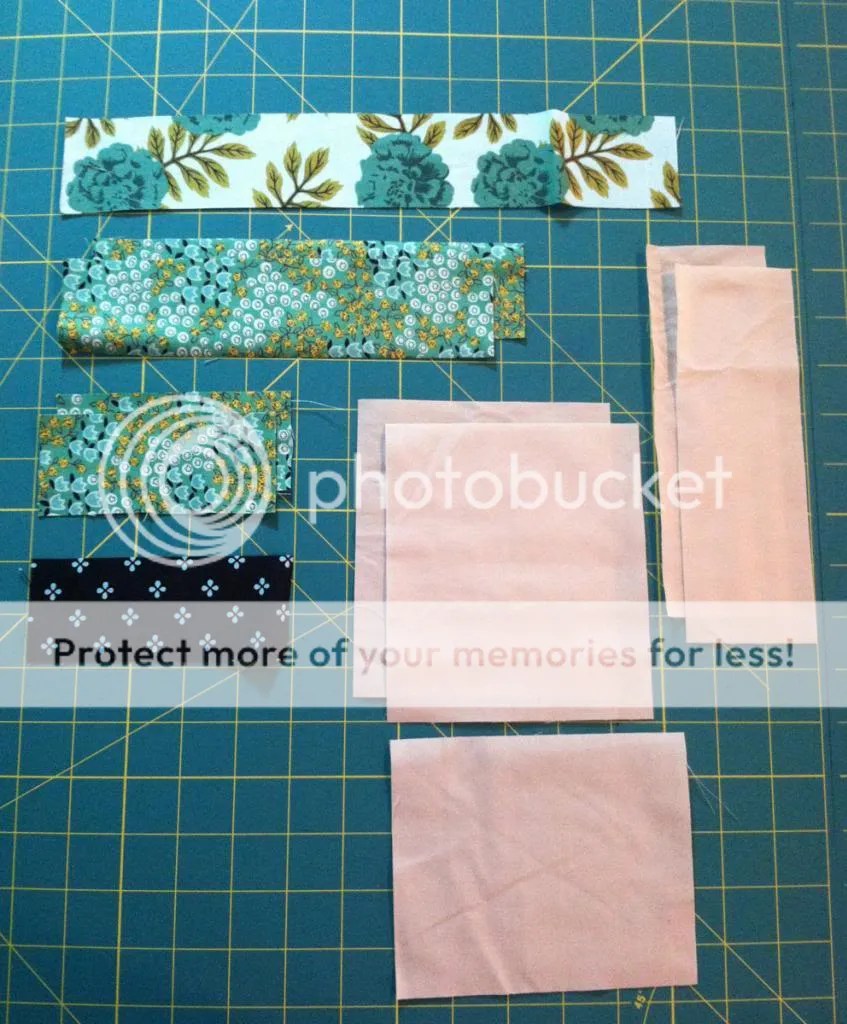
Which, I think looks lovely on both ladies’ blocks, but two things occurred to me while I was deciding how I wanted to arrange my block. First, the block is called pogo stick, so what part of the pogo stick are we looking at here? Second, how can I use more than one print in my block, but also retain the solid background fabric that I have used throughout all of the others? So I decided to break the block into a few different elements of the so called “pogo” I separated the square from the side pegs and then separated the center pole and arranged my fabrics from lightest to darkest in an attempt to create depth. So my pieces looked more like this:

I kept my off white background fabric, then chose Posy Navy for the side pegs, Bouquet Sprout for the square, and Garden Main Floral for the vertical pole. All of my fabrics for the entire Modern Blocks quilt a long are from Juliana Horner’s 2013, Rosette fabric line designed for JoAnn’s Fabrics.

Now the question becomes, was I happy with my deviation from the two reference blocks? Yes, yes I am very happy! I actually love the outcome of the Pogo Stick Block. It was so simple to piece, yet came to be such an awesome modern graphic composition! This is one block I can definitely picture as an entire quilt! And with a little google searching, you will see that others agree, there are numerous full Pogo Stick quilts out there and maybe someday soon I will have made one of them!

Be sure to head over to the Linky Party at And Sew We Craft to view the other quilter’s Pogo Stick blocks! I really enjoy seeing the little twist everyone puts into their own blocks, and this month there is plenty of variation!

Happy Hopping!

Erin Myone

Hi friends!

This month the Modern Blocks Quilt-a-long prize is going to be vote based rather than a random drawing. The prize this month is a: Fat Quarter Bundle of Cypress Acacia by Tula Pink for Free Spirit Fabrics. I sure would like to win, so if you don’t mind head on over to And Sew We Craft Block 6, scroll all the way to the bottom of the post and click on “Like” beneath block #2 by CollectCreateCirculate.com (which is my blog title). My block is pictured in this post, so just look for that on their website and click “Like” beneath it!
Don’t worry, you won’t receive a bunch of crazy emails for liking my block, your “like” is just one more vote for me to win some awesome fabric!

Recently I have been getting whipped by another block, so it’s time for a come back. I can only win this with your help! Show me the love! There are eleven days left to vote, and each day as my votes increase, so does the other block’s and somehow she always stays about 8 votes ahead. So if you can go back to the website a few times! You can only vote once a day from the same ip address, so I could use help from supporters of this blog to make up the difference!

Please, please, please, don’t make me beg! I would love to do some fun projects with the Cypress Acacia fabrics and share it here for all of you to see!

xo,

Erin Myone

And she’s on a roll!  And by “she” I mean me! The ladies of And Sew We Craft posted the October block yesterday! They are in Australia, so for them it was right on time (10/01), and for me in the Midwest United States it was a day early (9/30)– which was fine by me! This month’s block is the Best Friends block, it was hosted by Anorina over at the blog Samelia’s Mum. She gave a little background on the block, apparently the original designer is Angela Pingle who runs the blog Cut to Pieces. I have never come across Cut to Pieces, so I am excited to have another crafty blog to check out.

Above is Anorina’s block, she used a directional print so she utilized some special cutting instructions so that her elephants all run the same direction. Her tutorial for the October Best Friends block is here!

Amy at And Sew We Craft shared her Best Friend block in this month’s Modern Block Quilt a Long Introduction Post. She also cut her pieces with a directional print, and even fussy cut the adorable center piece to align the hula hoop girl!

I love what they both did with their directional prints, but In order to keep with my theme, I also wanted to maintain a similar use of my background fabric, so I cut the larger rectangles from my neutral solid. I was somewhat bummed to leave so much of the block blank when everyone else is employing such awesome prints for their blocks, but really this meshes better with my other blocks.

 Again, I used Juliana Horner’s 2013 Rosette fabric line which is sold exclusively at JoAnn’s Fabrics, which by the way I am in love with. It is so sweet with it’s blend of traditional and modern motifs and colors. This month I made it back to JoAnn’s and found another print (Ivy Tangerine) that had apparently arrived late at my local store, so of course I had to buy it and introduce it into my blocks!

So, the block construction was easy-peasy. It does include a partial seam, but really it isn’t difficult and from the front you can’t even tell which seam was the partial seam!

And since we are six months into the quilt a long, I decided to post a photo of all six blocks that I have completed so far! Half way there!

Are you working on any quilts right now? Did you join the Modern Blocks Quilt a Long? Let me know what you are up to in the comments!

xo,

Erin Myone

Bada-boom! I finished up the September 2013 Escalator block for the And Sew We Craft Modern Blocks Quilt A Long just in time! Phew!

Escalator Block Layout


This block was chosen from Modern Blocks by Cate at Life Behind the Purple Door. The escalator block was originally designed by Ann Haley. Like myself, Cate is still quite new to the quilting scene, but she did an excellent job explaining the cutting and construction of the block. Cate’s block is pictured below, and her tutorial for the block is available here!

Cate at Life Behind the Purple Door’s Escalator Block

When I first began constructing this block at the beginning of September, I had a real brain fart and couldn’t figure out what to do with the 2.5″ squares and the 2 .875″ triangles… My brain could not figure out what to do with the extra .375″. So I sat on my cut pieces for the rest of the month, without piecing them (not to mention the first time I started piecing them I had laid them out in the wrong order! displayed in the top un-pieced image above, this is the wrong layout. Don’t follow that image!) Instead, check out the illustrated tutorial I’ve shared below!


Cutting vs. Stitching Dimensions


Once again, I worked with Juliana Horner’s 2013 Rosette line for JoAnn’s Fabrics. And, like always, I constructed a little key to keep in my quilting notes.

Once I figured out the cutting versus stitching dimensions, the block was very easy to construct! And it was an excellent distraction from my academic work. I took my time to carefully align my corners and am really pleased with the finished block.

Be sure to check out all of the other participants September Escalator blocks at the Linky party!

We’ve completed five months of the twelve month Modern Blocks Quilt A Long, and the next block should be available very soon! Can’t wait to see what’s next from the ladies at And Sew We Craft!

xo,

Erin Myone

Remember all of those little triangles we trimmed off while making our flying geese in the block below?

Well, I got busy and started sewing those little triangles just about as quickly as I was cutting them to create teeny tiny half square triangles (HST). In this technique for HST, you begin with two equal triangles placed face to face, then you sew them down the long side to create a single square. See the brief illustrated tutorial below.

The Follow the Leader quilt block above has 16 flying geese, therefore 32 HST!. So once, I had all of these teeny tiny HST sewn, I started piecing them together into rows. Then sewing the rows together.

Once I finished piecing the tiny postage stamp sized HST together the finished block was a whopping 5″ x 6″!

By no means is this a perfectly pieced block, but really how could it be when the pieces are so tiny and individually pieced from tiny triangles!

But I do love my tiny little HST Postage Stamp quilt block. Maybe I will attach it to the Modern Blocks quilt backing when we complete the quilt a long!

Goodnight all, xo!

Erin Myone

Recently, I have become quite familiar with a piecing technique called “flying geese”. Flying geese are a common quilting element; they are often seen as an element of traditional and modern quilt blocks, or a repeating element across the entire quilt.

Above is an example of the traditional flying geese, you will notice that it is a geometric isosceles triangle (two sides and two angles are equal). Below is an example of a non-traditional flying geese, in this example the point is made in the same manner as those above, but the diagonals do not extend to the bottom of the colored block to create the triangle. Rather they meet the edge partway down the side and create a pentagram in the shape of a house.


Below I will explain how to make the traditional version of the flying geese block.

First, you will need three pieces for each “goose” you plan to make. For the traditional geese, you will want a rectangle where the length is two times the width (L=2W) .  For example, above I have illustrated a 4″x2″ rectangle . You will also need two squares, you will want each side of the squares to be equal to the rectangles width, so in this example the rectangle width was 2″ so each square will be 2″x2″.

Notice the dotted diagonal lines, these will be your stitching lines, and they will also create the short sides of your isosceles triangle (geese). Before you sew, it is wise to mark these diagonal lines on your squares so that you may follow the diagonal, in order to create a straight line. You may mark this line with a ruler and disappearing ink pen, colored pencil, or chalk.


Next, you will lay one square over the rectangle at a time, placing them face to face, and aligning the square on one half of your rectangle. Stitch the diagonal line that you have previously marked, with a short length straight stitch. I like to do a whole string of these at a time, before I move on to the next step!

You will now trim your seam allowance to the standard quilting 1/4″, as shown in the images above and below

Repeat these steps with each of your “geese”.

You will then press the pieces, with the seam allowance flattened towards the patterned or darker fabric. In the next image you will see the back and front of your piece thus far.

Here we go again!

Now, you will align the second square with the other end of the rectangle, be careful to align your marked diagonal so that it meets at a point in the center of your rectangle. Again stitch your marked line, trim your seam allowance, and press it towards the darker or patterned fabric.

Above, you will see an image that depicts the back and front of your flying geese. Notice that the point of your patterned fabric is about 1/4″ below the top of the rectangle, this will become the seam allowance when you sew your pieces together.

So there you have it! Your flying geese are ready to be put together into whichever block or quilt you like!


As you saw above in my example of a non-traditional flying geese, there are ways that you can modify these steps to change the shape of your pieced block. When modifying you may change the proportions of your length and width between the rectangle and the squares, just remember the length of the diagonal determines the depth of the point. You can easily choose a diagonal length that will stop midway down the side of your patterned piece to create the house like shape you saw in the Quatrefoil block above. Or choose to create a very shallow point by ending the diagonal only 1/4 of the depth of the patterned piece. There are so many ways you can play with the flying geese technique so be sure to try a few modifications and record your findings! Remember, quilting is all about geometry!

Now, if you are like me, you will have saved all of those little corners that you trimmed. In my next post, you will see what I have done with what would be fabric waste to many people. 😉